
| Look | Summer Aura Makeup
I recently received these beautiful mink lashes from Private Label Extensions and I wanted to create a look for my review. I was feeling in a summery mood but I didn't really know what I was going for, so I let my creativity and my mood guide me and this is the look I ended up creating. Makeup is a very emotional thing for me and I really let it take control in this look. I was very pleasantly surprised with how it turned out, especially since I was totally winging it. That just goes to show the power of creativity backed by emotions! This is one of those looks that looks worse before the very end when you pull it all together, so if you attempt this look, grind it out through its ugly phase because it will get better!
I found that as I started working, the look became increasingly dramatic and it ended up being quite an "Instagram Makeup Look", all I needed was the space buns to complete it! Haha.. Instagram makeup isn't usually my thing but it was really fun creating this more dramatic look and I still found it very wearable. So just be aware that this will be quite a heavy look all around.
I found that as I started working, the look became increasingly dramatic and it ended up being quite an "Instagram Makeup Look", all I needed was the space buns to complete it! Haha.. Instagram makeup isn't usually my thing but it was really fun creating this more dramatic look and I still found it very wearable. So just be aware that this will be quite a heavy look all around.
EYES
I started with my eyes because I knew this look was going to get a little messy with the layering of multiple shades. I always apply my Smashbox 24 Hour Photo Finish Eye Primer to prep, it's my favorite eye primer. I used all Colourpop Eyeshadows in hopes it would be easier to recreate for most people but some of the shades I used seem to have been limited edition or are no longer available. They do have many shades that are very similar though so you will be able to find something that will work. Here are the shades I used:


Right to left: Wait For It, Flower Boy, Making Moves, Cannonball , 143, Time Out


Time Out in pan
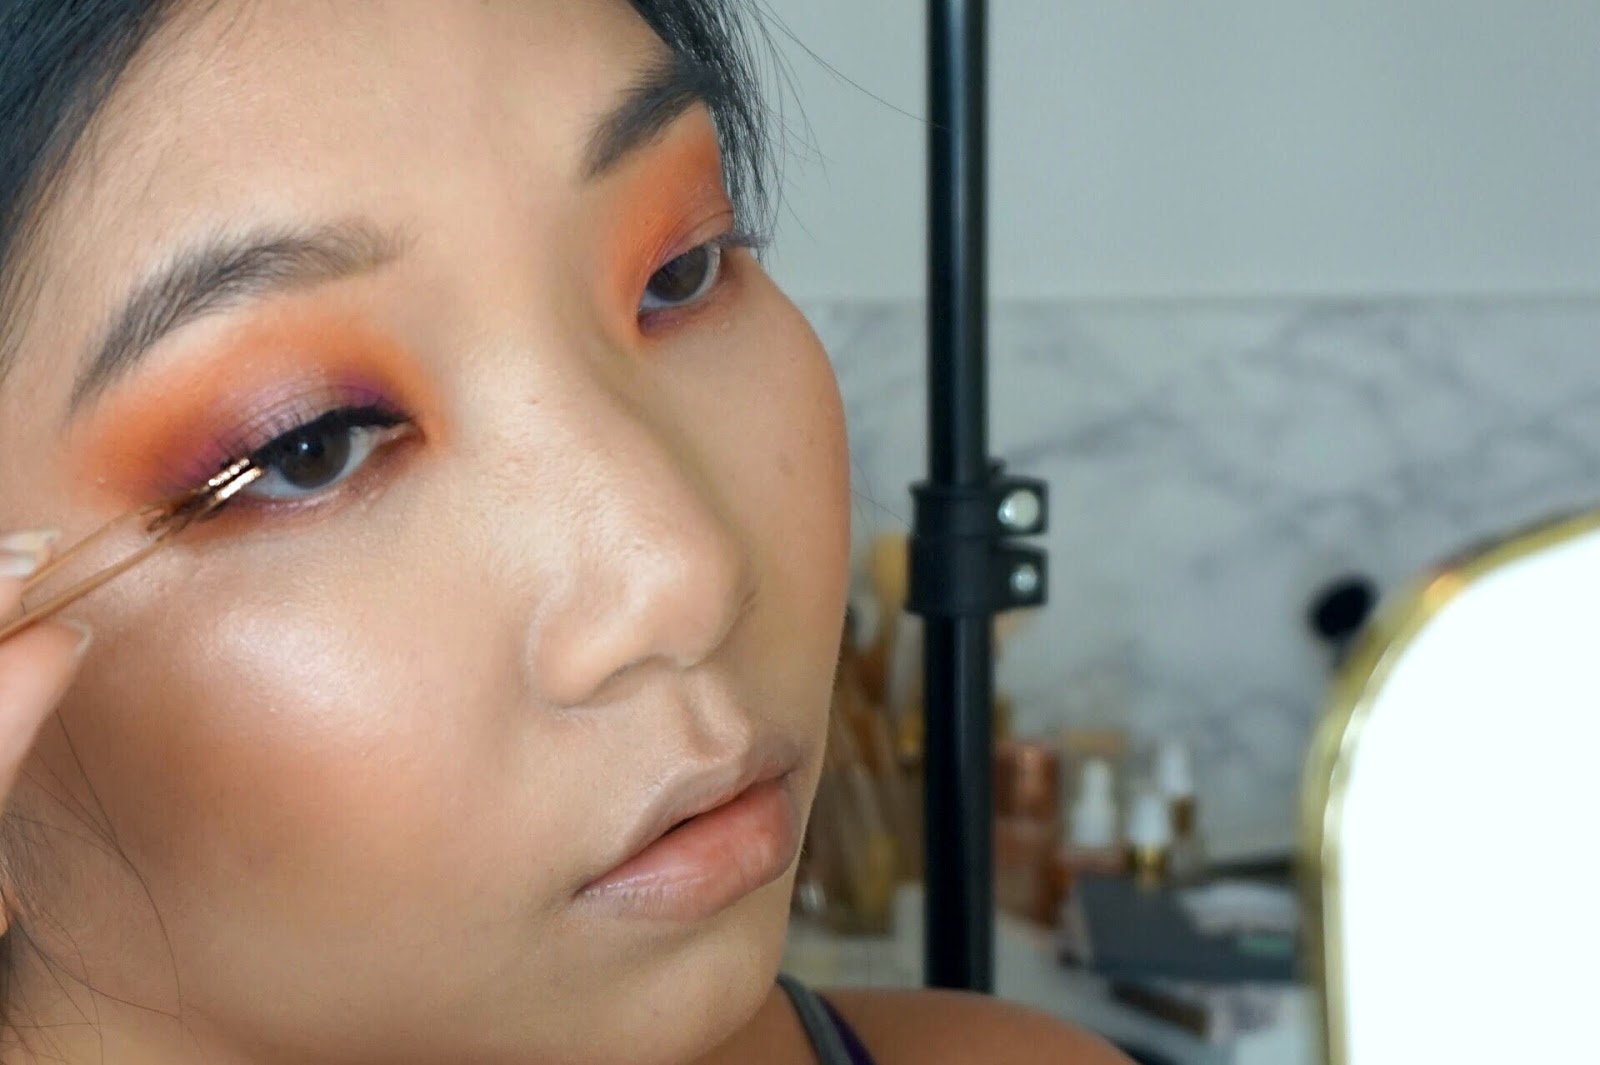
Wait For It - I started with this soft peachy coral shade and a blending brush. I place the color in the outer and inner crease of my eyes blending upward. Don't be afraid to pull it up quite high. Sometimes I go back in and blend more product toward the brow, after some of other shades have been placed. Seamless blending is key with this look!
Cannonball - Then I went in with this orange shade and blended it into the inner and outer crease and corner of the lid, blending it into the the Wait For It eyeshadow. Blend a bit toward the center of the eye but leave the very center blank. Go back in as many times as you need to.
Making Moves - I then took this matte hot coral shade and placed in the very depths of the inner and outer crease area. Again, blending is key! I go back in with the blending brush that I used to apply Cannonball to blend the edges of the color. I also blend a bit onto the lid but don't go past the Cannonball shade.
Flower Boy (LE) - (closets match - Pretty Cruel) I took a bit of this warm vibrant pink to help blend the Making Moves shade into Cannonball for a seamless transition. If you can't find a close shade, this one is not as necessary, it just helps better transition the colors.
Flower Boy (LE) - (closets match - Pretty Cruel) I took a bit of this warm vibrant pink to help blend the Making Moves shade into Cannonball for a seamless transition. If you can't find a close shade, this one is not as necessary, it just helps better transition the colors.
143 - Taking this vibrant warm purple shade, I placed this on the inner and out corners of the lid, blend a bit into the crease. This shade I really had to pack on multiple times because it blended into all the warm shades so well, you need to continue to go back in an pack on the color while blending the edges.
Time Out (LE) - (closest match - Comeback Kid) Finally, I took this duochrome light pink-coral shade and packed it into the very center of the lid up to the crease as well. Taking blending brushes from the the Cannonball shade and the eyeshadow brush from 143, I blended the edges for a seamless transition and gradient. This shade I also had to pack on multiple times as I blended until it was at the intensity I wanted.

I repeated this application to the lower lashline and made sure to blend the corners so they tied in well together. You want it to appear as a seamless glow and aura around the eyes.

I then applied some of the Avon True Color Glimmerstick Eye Liner is Blackest Back in my upper waterline. I was going to go for the winged liner and whole Instagram Makeup thing but I decided against it, though in hindsight, it would have been wise to help hide the lash band a little. I still think the look turned out awesome.
After seeing how intense my eye look was, I desperately needed to fill in my brows! I went in with my favorite brow pencil the Burberry Effortless Brow Pencil and filled in my brows a little more heavily than I normally would until my eyes looked more balanced.
FACE
I went back to finish my eyes at the end with lashes but I wanted to first get my face makeup on. Because the eye look is so dramatic, I felt like I really needed a very flawless base so any imperfections or redness wouldn't distract from the eye look. I chose the Tom Ford Traceless Foundation Stick because while it can e full coverage, it doesn't look or feel heavy and blends into the skin very seamlessly. I swiped it heavily over my face and used a beauty sponge to blend and press the foundation into the skin. I even blended it under the eyes as my my under eye concealer. You can always use a separate concealer, as is typical and traditional of Instagram Makeup but start to feel quite heavy.

I then powdered all over with my favorite powder, the Givenchy Prisme Libre Loose Powder. It blurs and prefects the skin but also leaves a beautifully soft and glowy finish.
Then I went in with the Dior Backstage Contour Palette (full review here) to sculpt my face. I took the cool toned shade labeled Light Contour and blended it under my cheek bones, along my jawline, a bit on my temples and on the sides of my nose. I took the shade labeled Highlighter Deep and used it to blend out my contour.

I wasn't sure if I wanted blush with this look because the look is so intense but I decided to I looked too washed out and I needed a touch of color to my cheeks. I opted for the Tom Ford Sheer Cheek Duo in Exotica Flora (full review here) and I mixed the two shades to create this beautiful pink-coral flush that complimented the eyes perfectly!


Finally for the face, I went back in with the Colourpop Time Out Eyeshadow and used it as my highlighter with a fan brush. What is a better and more complimenting highlight than the exact color you used on the eyes? It was perfect.
LASHES & LIPS
These final and important touches really tie the whole look together and make it look really complete. I curled my lashes first, then I took my Private Label Extensions 3D Mink Eyelashes in Lola and trimmed the last three notches of lashes off the end. My eyes are too small to wear them as they are. Then I held them in my Private Label Extensions Rose Gold Lash Applicator while applied the glue. I waited a minute let it get tacky, then applied the lash to my lid. Starting in the middle and tucking the corners. I pinched my natural lashes and the mink ones together and the eyes are complete!

For lips, since the look was already so dramatic, I opted for a simple shimmering lip gloss. I used the Louboutin Loubilaque Lip Gloss in Iriza (full review here) on my lips because it has some copper and rose sparkles that would go with the shades I used on the eyes.


After seeing how intense my eye look was, I desperately needed to fill in my brows! I went in with my favorite brow pencil the Burberry Effortless Brow Pencil and filled in my brows a little more heavily than I normally would until my eyes looked more balanced.
FACE
I went back to finish my eyes at the end with lashes but I wanted to first get my face makeup on. Because the eye look is so dramatic, I felt like I really needed a very flawless base so any imperfections or redness wouldn't distract from the eye look. I chose the Tom Ford Traceless Foundation Stick because while it can e full coverage, it doesn't look or feel heavy and blends into the skin very seamlessly. I swiped it heavily over my face and used a beauty sponge to blend and press the foundation into the skin. I even blended it under the eyes as my my under eye concealer. You can always use a separate concealer, as is typical and traditional of Instagram Makeup but start to feel quite heavy.
Then I went in with the Dior Backstage Contour Palette (full review here) to sculpt my face. I took the cool toned shade labeled Light Contour and blended it under my cheek bones, along my jawline, a bit on my temples and on the sides of my nose. I took the shade labeled Highlighter Deep and used it to blend out my contour.
LASHES & LIPS
These final and important touches really tie the whole look together and make it look really complete. I curled my lashes first, then I took my Private Label Extensions 3D Mink Eyelashes in Lola and trimmed the last three notches of lashes off the end. My eyes are too small to wear them as they are. Then I held them in my Private Label Extensions Rose Gold Lash Applicator while applied the glue. I waited a minute let it get tacky, then applied the lash to my lid. Starting in the middle and tucking the corners. I pinched my natural lashes and the mink ones together and the eyes are complete!
THE FINISHED LOOK


Shop the look:


0 Comments